
Buttons so good they’re…Wicked!
Having Friends in your 30s can be hard. Everyone is booked out for months in advance, kids are popping up into the planing equation and moving to different states for better opportunity’s is more common than not. That can make the simple task of going to see a movie with a girlfriend challenging but thanks to the corporate grind and some extra coins… anything is possible ;)
This past weekend I flew to SLC to see wicked for good with one of my best friends. Yes, you read that correctly and let me tell you I will do this again and again LOL. It was an absolute blast and honestly some movies are just more enjoyable with a friend by your side who is willing to ALSO wear matching THEMED outfits .

I knew I hadn’t been to hobby lobby in a week… I mean I knew I wanted to make us some wicked themed buttons to go on our pink and green sweaters and well the rest is history. The inspo was very nostalgic. Do the kids these days still make homecoming mums??? This was an activity I looked forward to every single year and lowkey because of that making these wicked buttons before we went to the movie was super easy.
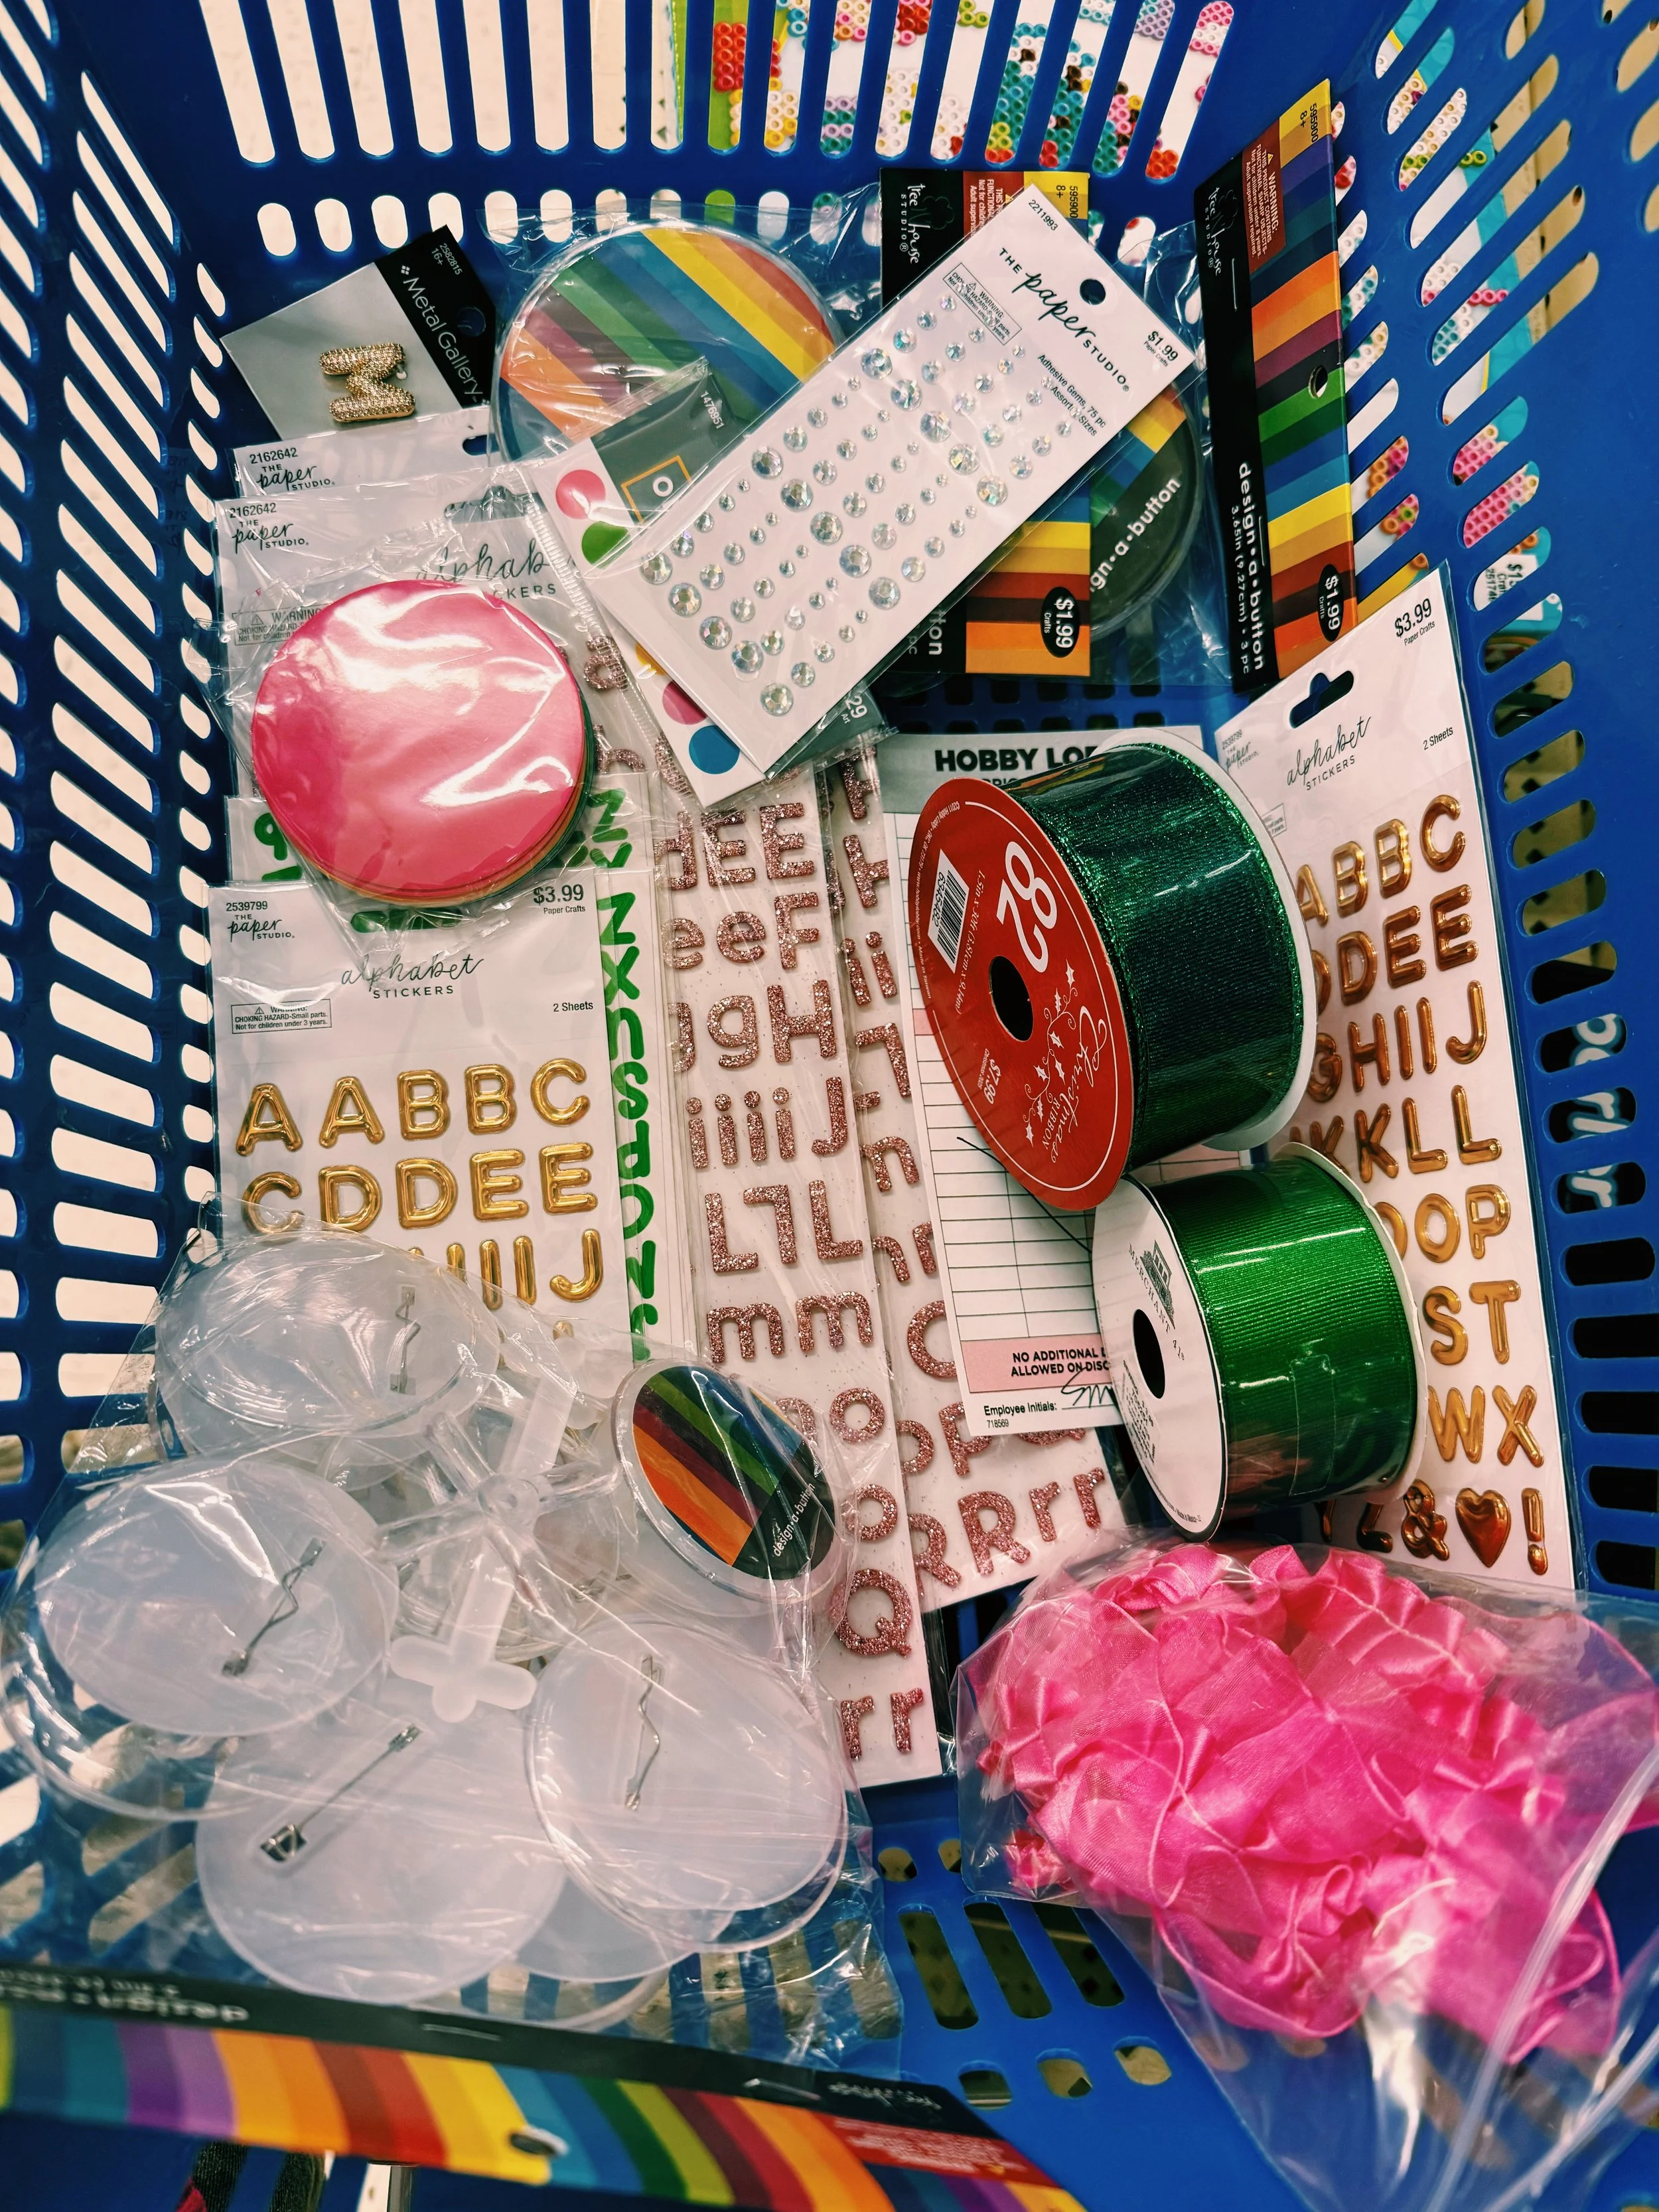
Materials bought:
Buttons
Stickers (in wicked colors of course)
Ribbon (3 shades of green in varying widths)
Pink trim
Cardstock
Pre-cut circles
Other materials needed:
Stapler
Scissors
Glue gun
I would say the green 100% that witch button was the most involved and mum like. This doesn’t take a lot of skill in my opinion but could easily be replicated for any event (birthday, bachelorette, you name it).

I started by making the points. Cutting a short strip of ribbon, making the point and stapling so that it would stay. Repeat this process 7 times and then staple mania begins (Insert evil laugh here). Take one of your pre-cut circles and start arranging the points around the circle and stapling into place.
Next you need 3 strips of your widest ribbon. Arrange and staple so they overlap a bit and be sure to cut the ends to be cute. Ain’t nobody got time for ugly up in here.
Now you’re ready to put your saying on a different pre-cut circle. NGL I used the help of the robot to figure out short sassy sayings. These buttons arent THAT big so we had limited space to work with.
From there ladies and gentleman…start your glue guns! This becomes just a sandwich of hot glue…my personal favorite :)
Gluing order:
Empty pre-cut circle to the back of stapled ribbon circle
That to the blank button
Saying circle to the stapled button circle
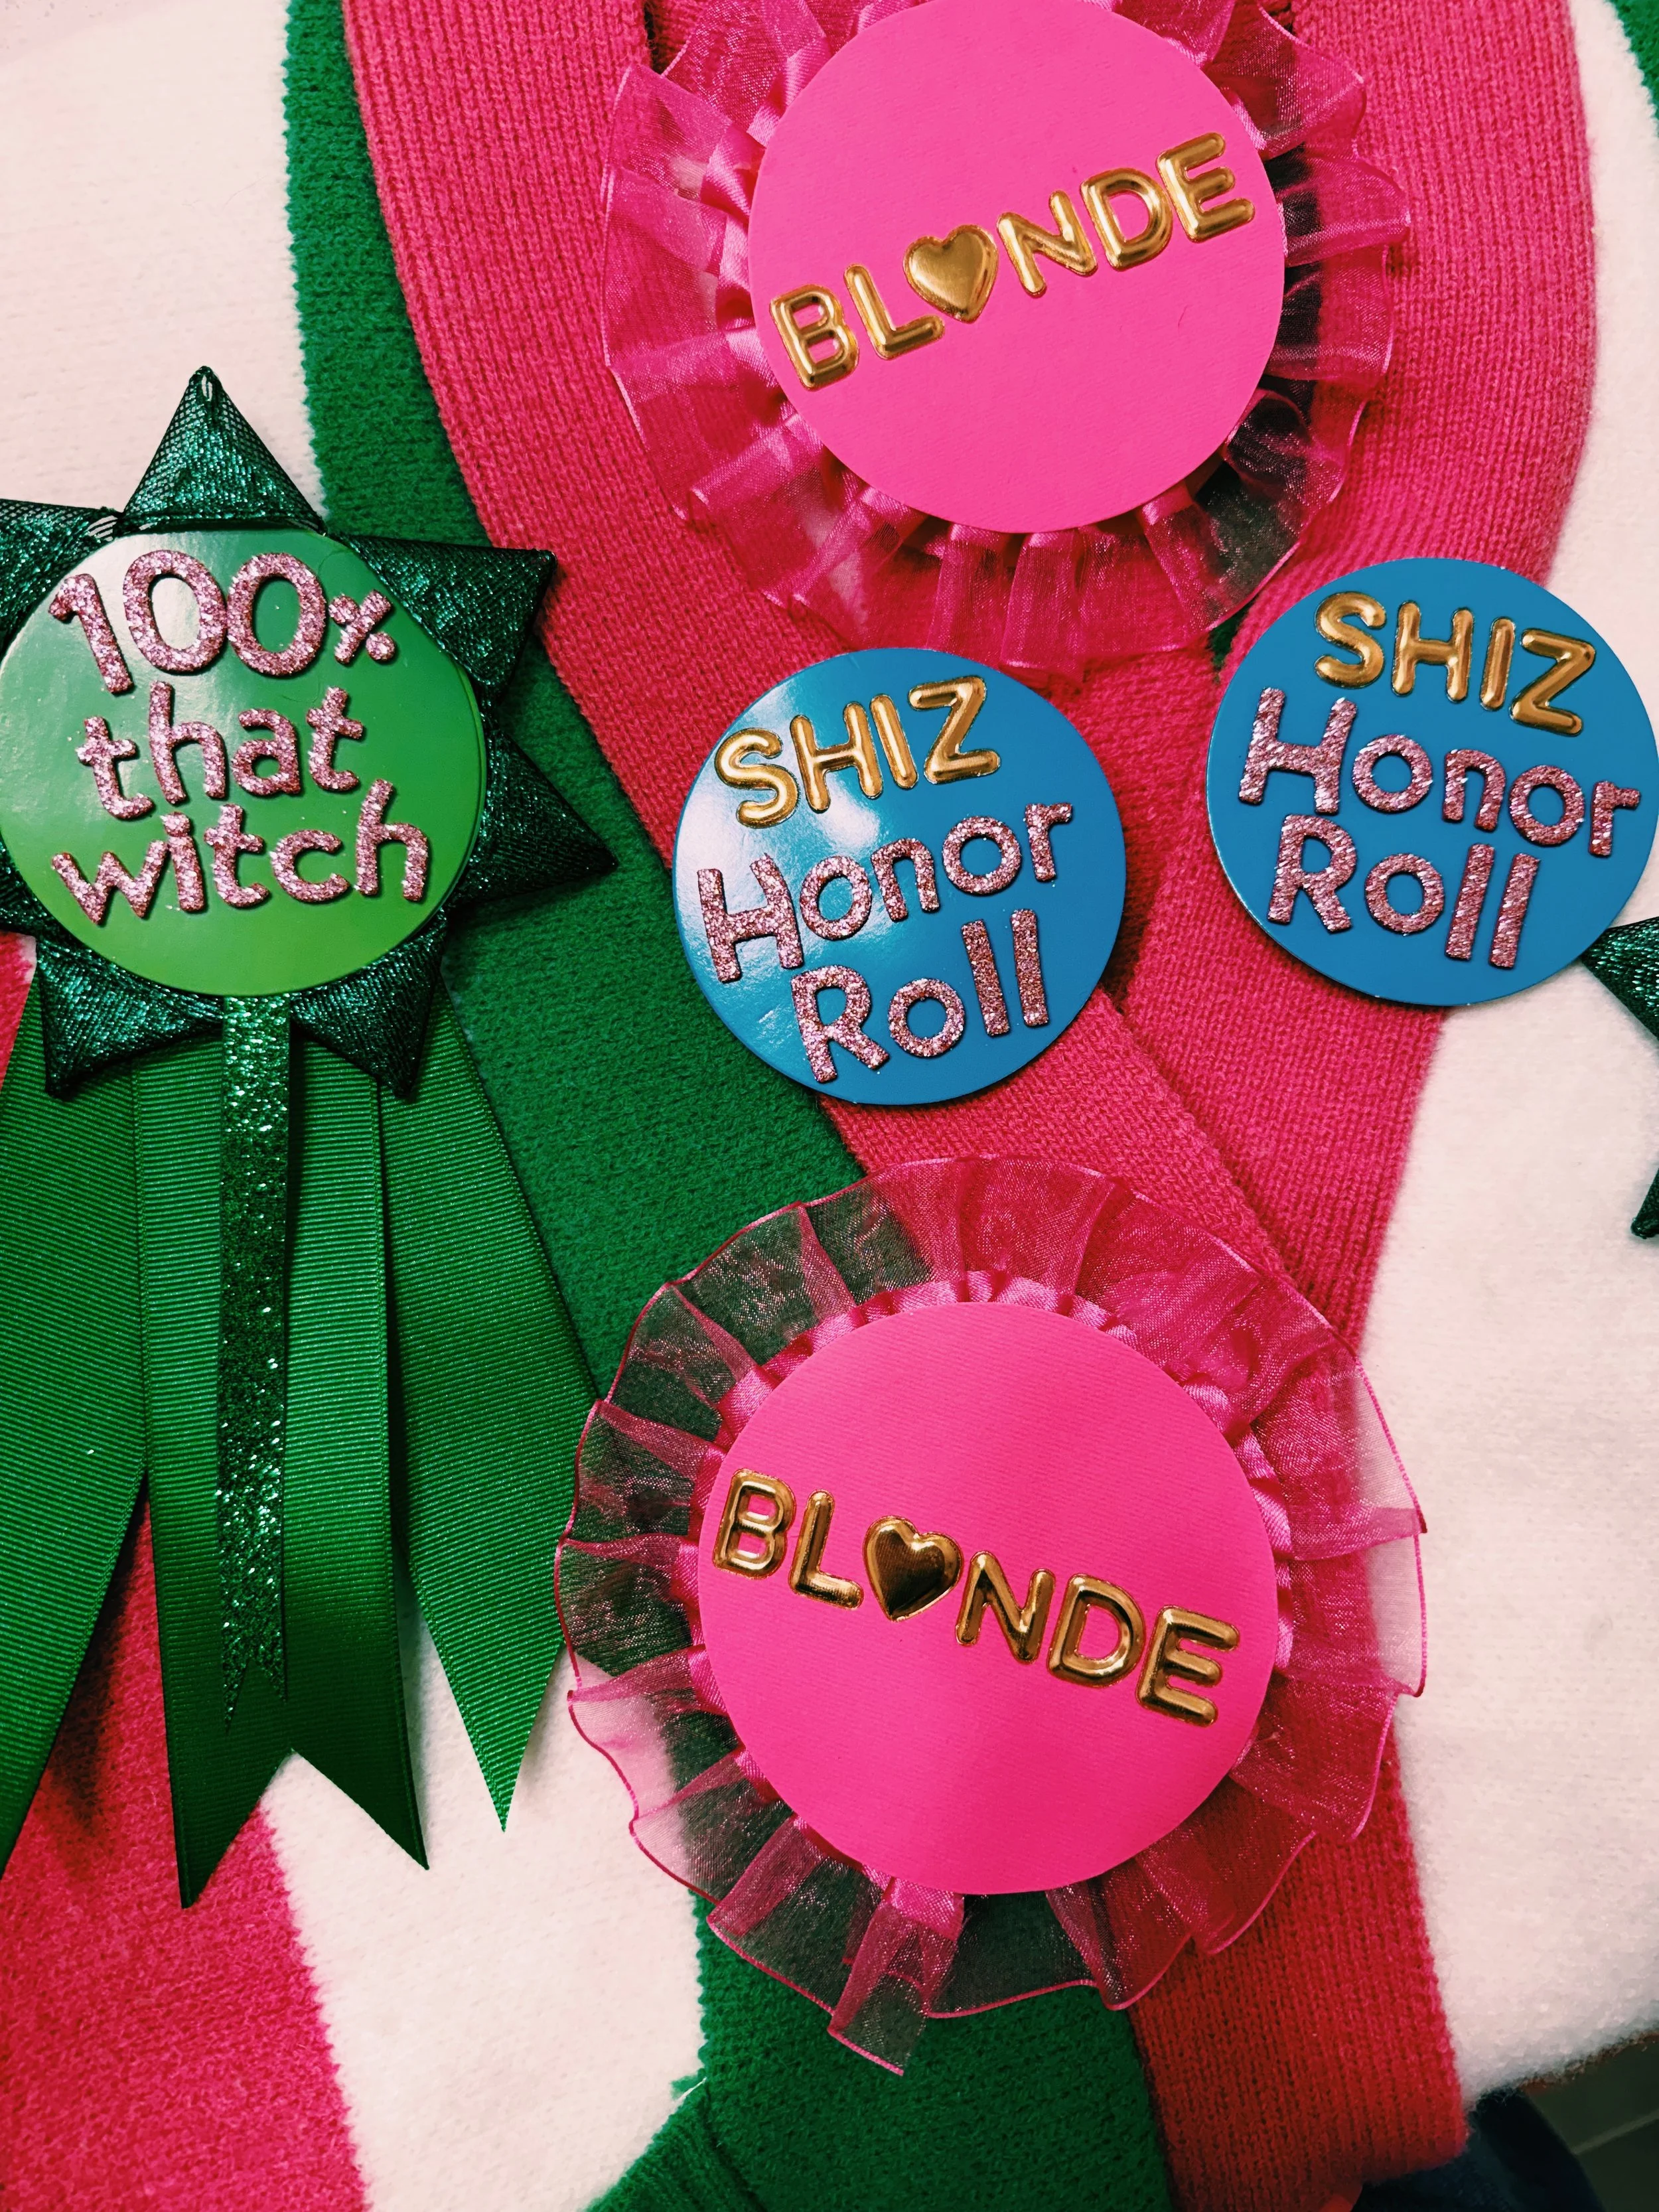
Idk if that made a lick of sense or if those reading this even care for that matter but wanted to share in case someone was curious. Crafting is one of the things that brings me the most joy and I was so obsessed with how these turned out. They looked AMAZING on our cardigans and we got lots of comments when we went to the theatre.
10/10 recommend seeing the movie if you haven’t already. It was magical. And we TOTALLY need more magic up in this world these days.